Wednesday 27 November 2019

Yocto Linux build for RPI


#To Check supported Boards

  •  ls meta/conf/machine/*.conf
Add this layer to bblayers.conf and the dependencies above

  • # nano conf/bblayers.conf 
 

Set MACHINE in local.conf to one of the supported boards
  • #bitbake core-image-base
dd to a SD card the generated sdimg file (use xzcat if rpi-sdimg.xz is used)
Boot your RPI.


Ref:


Tuesday 17 September 2019

Building your DevSecOps pipeline: 5 essential activities

This artical copied from below link:
https://www.synopsys.com/blogs/software-security/devsecops-pipeline-checklist/?cmp=em-sig-eloqua&utm_medium=email&utm_source=eloqua


This checklist describes the purpose, benefits, key enablers, and use cases of the top five key elements of the DevSecOps pipeline. Get started now.


No matter what you call it, SecDevOps, DevSecOps, or DevOpsSec, you have to build security into your continuous integration, continuous delivery, and continuous deployment pipeline. This checklist will guide you through the DevSecOps journey—as we’ll call it within this checklist—to assure that you’re integrating security into your pipeline.
Here, we’re going to look at each of the five activities listed in the overview above. We’ll examine their purpose, benefits, key enablers, and use cases. Let’s dig in.

1. Pre-commit checks

Pre-commit checks, the first step in the DevSecOps pipeline, consist of steps to complete before the developer checks code into the source code repository.
Purpose. Pre-commit checks are used to find and fix common security issues before changes are committed into source code repositories.
Benefits. The use of pre-commit hooks is very powerful. They can help a team automate manual tasks and increase their productivity. Additionally, security checks using static analysis tools in the IDE can take place with a limited number of rules.
Key enablers. Pre-commit checks enable activities such as updating a threat model when controls or new assets are added to the application. They also enable manual code review when a large change in the code base is detected. These checks can additionally trigger risk analysis when identifying security vulnerabilities.
Use case. These checks enable development teams to run scans in their IDE using Code Sight. This tool automatically provides ‘just in time’ security guidance as the code is written. Rather than scanning for bugs after the code is written and committed to your source code repositories, Code Sight acts as a desktop security expert. It provides guidance automatically when developers create code where risk may be introduced.
Next, create hooks to trigger activities such as threat modeling, architecture risk analysis, and manual code review. Create additional hooks to review your configuration files for hard-coded credentials.
Finally, use these hooks to distribute email notifications to your application security team or software security group (SSG). Notify them about critical code changes that developers have checked into source code repositories.

2. Commit-time checks

The next step in the DevSecOps pipeline is commit-time checks. This activity is automatically triggered by a check-in to a source code repository.
Purpose. To build and perform basic automated testing of the application. These tests return fast results to developers who committed the change to the source code repository.
Benefits. Commit-time checks ensure that code is compilable and buildable at all times. They also bring attention to critical and high security issues.
Key enablers. These checks identify well-defined processes for various software security activities. They also empower development teams to remediate critical and high risk issues. Additionally, they empower QA security testing.
Use case. First, compile and build the code. Next, configure and run static analysis with limited rule sets. One recommendation is to run your firm’s top 3 vulnerabilities (identified annually). For instance, vulnerabilities such as SQL injection and/or reflected and stored cross-site scripting (XSS). Use static application security testing (SAST) tools like Coverity to identify security issues. This is a fast, incremental scan that provides feedback to developers in minutes.
Next, automate security testing and gather metrics. Break the build and alert relevant teams on critical and high security issues.

3. Build-time checks

Build-time checks, the third activity in the DevSecOps pipeline, are automatically triggered by successful commit-time checks.
Purpose. To perform advanced automated testing of the application. This includes a deeper level of SAST, open source management, security testing, risk-based security tests, signing binary releases with PGP signatures, and storing artifacts in repositories.
Benefits. Build-time checks break the build in any failure, including:
  • When code doesn’t compile
  • In the event that unit tests fail
  • SAST failures
  • A high number of findings
  • When vulnerabilities are found (e.g., SQL injection or XSS)
These checks also identify dependencies and checks if there are any known, publicly disclosed vulnerabilities using tools (e.g., SCA).
Key enablers. These checks empower QA security testing with a well-defined process for various software security activities. They also empower development teams to remediate critical and high risk issues as they’re introduced.
Use case. Build-time checks allow users to configure more comprehensive SAST rule sets, such as the OWASP Top 10 when dealing with web applications. They also configure jobs to identify risks in third-party components, using tools such as Black Duck. These checks automate risk-based security testing. Risk-based security testing runs specific security tests based on the risk profile of the system.
Each test is intended to probe a specific risk that has been previously identified through risk analysis. They alert development teams of critical and high risk issues. They even digitally sign artifacts and store them in your artifact repositories. Last, but not least, build-time checks gather useful metrics.

4. Test-time checks

Moving down the DevSecOps pipeline, test-time checks are automatically triggered by successful build-time checks.
Purpose. Pick the latest ‘good’ build from the artifact repository and deploy it to a staging or test environment. All tests, including functional, integration, performance, advanced SAST, and DAST are executed on this build.
Benefits. This is the last testing phase before a product is released into production. The staging environment is the most representative of the production environment.
Key enablers. Test-time checks require well-defined processes for various software security activities. They empower development teams to remediate critical and high risk issues as soon as they’re introduced. They additionally empower QA security team testing methods. In addition, they trigger manual code review using SAST tools and out-of-band penetration testing.
Use case. Configuring a broader set of rules for SAST, in this case, might include using the tool’s full security rule sets. Since you already ran SAST in the earlier checks, ensure that you run tests that haven’t yet been covered. Configure to run DAST tools. The rule sets should test for common critical and high severity issues such as those outlined in the OWASP Top 10.
Include fuzz testing tools such as Defensics. Fuzz testing provides random data to the program’s input parameters in the hopes of causing an error state. Failing to handle malformed input properly can lead to security issues.
Configure and automate the deployment of the latest ‘good’ build to the staging environment. Then, alert the development teams of the critical and high risk issues. And finally, gather metrics from these activities.

5. Deploy-time checks

If all of the previous steps have been completed successfully, and the application is ready for deployment, deploy-time checks involving additional pre- and post-deployment security checks finish out the DevSecOps pipeline.
Purpose. Testing post-deployment provides an ongoing level of assurance that changes to the production environment haven’t introduced security issues. A good strategy is to implement a process that periodically triggers security testing.
Benefits. Deploy-time checks can help find bugs that may have slipped through pre-production testing activities. Continuous monitoring allows an organization to gain insight into the types of traffic a given application is receiving. Additionally, collecting application-level security metrics helps identify patterns of malicious users.
A threat intelligence program can also help teams stay ahead of the curve by proactively responding to newly discovered security issues that affect applications and platforms.
Key enablers. Defects identified through this activity can be fed back to development teams and used to change developer behavior.
Use case.
Pre-deployment
  • Automate configuration management
  • Automate provisioning the runtime environment
Post-deployment
  • Automate collecting application-level security metrics during continuous monitoring
  • Schedule security scanning
  • Perform vulnerability scanning
  • Assist in bug bounty scanning
  • Create an incident response plan
  • Provide insight to the DevSecOps team to drive a threat intelligence program

Examining a sample DevSecOps workflow

When implementing security into your DevSecOps pipeline, it’s important to conduct these activities with purpose. None of the checks are set in stone. You can more activities earlier or later within the development process as they suit your life cycle operations.
Let’s look at a sample deployment diagram that shows a high-level workflow. The visual below illustrates how these activities are performed and triggered.
DevSecOps pipeline checklist

Pre-commit phase

As a developer checks in code, the pre-commit hooks review changes to the code and configuration before committing it to the source code repository (e.g., SVN or Bitbucket). Client-side and server-side hooks are both relevant here.

Commit-time phase

Next, once the code is committed to the source code repository, run commit-time checks. This includes incremental SAST with predefined rule sets that provide quick feedback for developers (within seconds of code check-in). If you find critical or high risk issues (e.g., SQL injection or XSS), you must break the build and notify the developer immediately.
SAST should be incremental. In other words, run SAST only on the set of files that change. Additionally, be sure to gather metrics into a centralized dashboard. Automate defect tracking and create a defect. After all, security issues should be treated in the same fashion as quality issues.

Build-time phase

Once the commit-time checks are successful, the next phase in the DevSecOps pipeline are the build-time checks. Here, you’ll want to run even more comprehensive rule sets using SAST. Perhaps you’ll also want to run the OWASP Top 10 for your application. At this point, you should also run a software composition analysis (SCA) tool to identify vulnerabilities within your free and open source software (FOSS) or any associated licensing issues. As we saw with the commit-time checks, here you’ll want to break the build, automate bug tracking, and gather metrics.

Test-time phase

At this point, it’s time to move on to test-time checks. Before running security activities, ensure that you use the latest successful build artifact. If you aren’t confident of your SAST rules, run a full rule set of SAST analysis. Once your SAST tools give you a green signal, run DAST or IAST tools that you have configured. If you also own a fuzz testing tool, this is the right time to run it as well.
All vulnerabilities identified during your SAST, DAST, IAST, and fuzz testing activities should break the build, gather metrics, and immediately create a defect in your bug tracking system.
By now, you’re probably getting an idea of how your changes are progressing through the DevSecOps pipeline. You’re probably seeing what activities completed successfully, which vulnerabilities were found all in one dashboard, and whether to continue the DevSecOps pipeline or pause/stop the change from going into production.

Deploy-time phase

Now we move into the final phase: pre- and post-deployment checks. This is the time to automate configuration management. Provision the runtime environment (e.g., check access control and group permissions) if your application is using SSL to connect to the database.
Once the application goes live, schedule security scanning to identify bugs that may have slipped through pre-production testing. Implement a bug bounty program to triage and investigate issues reported by users. Enable continuous monitoring to gain insight into the types of traffic a given app receives.
Additionally, collecting application-level security metrics helps to identify patterns of malicious users. Last, but certainly not least, a threat intelligence program can help teams stay ahead of the curve. It can help teams proactively respond to newly discovered security issues affecting applications and platforms.

Summing it up

In this workflow, the focus is centered around only a few security activities. There are many more that could be covered in great detail (e.g., performing malicious code detection in the DevSecOps pipeline). This workflow also assumes that you have already automated other activities (e.g., unit tests, functional tests, user acceptance tests, integration tests, etc.).
A valuable takeaway here is that automation is key for DevSecOps. It’s also of great importance to have a DevSecOps pipeline with such highly valuable security activities. Bringing in one or more application security tools and automating that tool to scale security activities won’t cut it. If these tools aren’t properly configured, it will most assuredly backfire.
Security activities must be an integral part of the DevSecOps pipeline. DevOps teams have to own security the same way they own development and operations.

DevSecOps pipeline checklist

Friday 31 May 2019

temperature-monitor-using-msp430-launchpad-and-lm35-temperature-sensor

Here I summarize the hardware connections and source code to build a Temperature Monitor using MSP430 Launchpad and LM35 Sensor.
Project: Temperature Monitor with LCD Display
Microcontroller: MSP430G2231 on MSP-EXP430G2 Launchpad
Temperature Sensor: LM35
16×2 LCD Display: 1602K27-00

Hardware connections

Board jumper changes:
1. Isolate LEDs connected to P1.0 and P1.6 by removing Jumpers cap J5.
2. Isolate RX/TX connected to P1.1 and P1.2 by removing those Jumper cap in J3
Microcontroller and Temperature sensor Connections:
P1.1 – Vout of LM35
Microcontroller and LCD Connections
TP1 – Vcc (+5v)
TP3 – Vss (Gnd)
P1.2 – EN
P1.3 – RS
P1.4 – D4
P1.5 – D5
P1.6 – D6
P1.7 – D7
Gnd – RW
Gnd – Vee/Vdd – Connect to Gnd through a 1K Resistor – this value determines contrast – i.e. without resistor all dots always visible,  whereas higher resistor means dots not at all displayed.
Gnd – K (LED-)
Vcc – A (LED+) +5V – For Backlight
Clock: 1MHz
 Usage of LM35

Usage of LM35
Temperature Monitor Schematic

This project is built using Energia IDE with integrated build tool chain (compiler/linker).

Source code

#include <msp430g2231.h>
#include <stdlib.h>
#include <string.h>
// uC GPIO Port assignment
#define UC_PORT      P1OUT
#define UC_PORT_DIR P1DIR
// LCD pin assignments
#define LCD_EN        BIT2
#define LCD_RS        BIT3
#define LCD_DATA    BIT4 | BIT5 | BIT6 | BIT7
#define LCD_D0_OFFSET 4 // D0 at BIT4, so it is 4
#define LCD_MASK    LCD_EN | LCD_RS | LCD_DATA
// Connect P1.1 to LM35 temperature sensor output
#define TEMP_IN      BIT1
char temperature_string[4];
short temperature = 0;
void lcd_reset()
{
UC_PORT = 0x00;
__delay_cycles(20000);
UC_PORT = (0x03 << LCD_D0_OFFSET) | LCD_EN;
UC_PORT &= ~LCD_EN;
__delay_cycles(10000);
UC_PORT = (0x03 << LCD_D0_OFFSET) | LCD_EN;
UC_PORT &= ~LCD_EN;
__delay_cycles(1000);
UC_PORT = (0x03 << LCD_D0_OFFSET) | LCD_EN;
UC_PORT &= ~LCD_EN;
__delay_cycles(1000);
UC_PORT = (0x02 << LCD_D0_OFFSET) | LCD_EN;
UC_PORT &= ~LCD_EN;
__delay_cycles(1000);
}
void lcd_cmd (char cmd)
{
// Send upper nibble
UC_PORT = (((cmd >> 4) & 0x0F) << LCD_D0_OFFSET) | LCD_EN;
UC_PORT &= ~LCD_EN;
// Send lower nibble
UC_PORT = ((cmd & 0x0F) << LCD_D0_OFFSET) | LCD_EN;
UC_PORT &= ~LCD_EN;
__delay_cycles(4000);
}
void lcd_data (unsigned char dat)
{
// Send upper nibble
UC_PORT = ((((dat >> 4) & 0x0F) << LCD_D0_OFFSET) | LCD_EN | LCD_RS);
UC_PORT &= ~LCD_EN;
// Send lower nibble
UC_PORT = (((dat & 0x0F) << LCD_D0_OFFSET) | LCD_EN | LCD_RS);
UC_PORT &= ~LCD_EN;
__delay_cycles(4000); // a small delay may result in missing char display
}
void lcd_init ()
{
UC_PORT_DIR = LCD_MASK;     // Output direction for LCD connections
lcd_reset();         // Call LCD reset
lcd_cmd(0x28);       // 4-bit mode – 2 line – 5×7 font.
lcd_cmd(0x0C);       // Display no cursor – no blink.
lcd_cmd(0x06);       // Automatic Increment – No Display shift.
lcd_cmd(0x80);       // Address DDRAM with 0 offset 80h.
lcd_cmd(0x01);     // Clear screen
}
void display_line(char *line)
{
while (*line)
lcd_data(*line++);
}
void display_temperature(char *line, int len)
{
while ((3-len) > 0)
lcd_data(‘ ‘);
while (len–) {
if (*line)
lcd_data(*line++);
}
lcd_data(0xDF); // degree symbol
lcd_data(‘C’);
}
void initADC(void)
{
// initialize 10-bit ADC
UC_PORT_DIR &= ~TEMP_IN;  // input direction for output from sensor
ADC10CTL0 |= ADC10ON;
ADC10CTL1 |= INCH_1|ADC10SSEL_1|CONSEQ_1;
ADC10AE0  |= BIT0 | BIT1;
ADC10CTL0 |= ENC|ADC10SC;
}
void setup() {
WDTCTL = WDTPW + WDTHOLD;   // Stop Watch Dog Timer
// Initialize LCD
lcd_init();
// Initialize ADC
initADC();
lcd_cmd(0x80); // select 1st line (0x80 + addr) – here addr = 0x00
display_line(“Temperature”);
lcd_cmd(0xce); // select 2nd line (0x80 + addr) – here addr = 0x4e
}
void loop() {
// measuring the temperature
temperature = (analogRead(A1)*35)/100;
// displaying the current temperature
lcd_cmd(0xcb); // select 2nd line (0x80 + addr) – here addr = 0x4b
itoa(temperature, temperature_string, 10);
display_temperature(temperature_string, 3);
__delay_cycles(500000);       // 0.5sec measurement cycle
}
You can also download source code
  Temperature_Monitor.ino (3.1 KiB, 1,076 hits)
Temperature_Monitor.ino - this is basically a C source file in Energia IDE format.
Temperature Monitor in action

Temperature Monitor in action

u-boot-tools-for-debian-arm-linux-in-qnap-server

Here is a small note on how to install U-Boot tools to manage boot loader from linux environment. This will provide a tool for printing environment for the bootloader U-Boot (fw_printenv) and modifying the same (fw_setenv).
1. Install the necessary U-Boot support packages
# apt-get install u-boot uboot-envtools
You can find your MTD partition information in /proc/mtd file as shown below.
# cat /proc/mtd
dev: size erasesize name
mtd0: 00080000 00040000 “U-Boot”
mtd1: 00200000 00040000 “Kernel”
mtd2: 00900000 00040000 “RootFS1”
mtd3: 00300000 00040000 “RootFS2”
mtd4: 00040000 00040000 “U-Boot Config”
mtd5: 00140000 00040000 “NAS Config”
2. Create a configuration file /etc/fw_env.config for U-boot environment in the machine. In my case it is QNAP TS-110 Home Server. Here is the configuration file.
# Configuration file for fw_(printenv/saveenv) utility for
# QNAP TS-119, TS-219 and TS-219P.
# MTD device name Device offset Env. size Flash sector size
/dev/mtd4 0x0000 0x1000 0x40000
You have good chances of getting fw_env.config file for your machine in /usr/share/doc/uboot-envtools/examples (installed by uboot-envtools).
In case you don’t have the above file, you will end up with the following error message while issuing the fw_printenv command.
# fw_printenv
Cannot parse config file: No such file or directory
As an another error case, if you have wrong configuration file it will throw the following error message.
# fw_printenv
Warning: Bad CRC, using default environment
bootcmd=bootp; setenv bootargs root=/dev/nfs nfsroot=${serverip}:${rootpath} ip=${ipaddr}:${serverip}:${gatewayip}:${netmask}:${hostname}::off; bootm
bootdelay=5
baudrate=115200
Here is the output of fw_printenv command in my server.
# fw_printenv  
baudrate=115200
loads_echo=0
rootpath=/mnt/ARM_FS/
console=console=ttyS0,115200 mtdparts=cfi_flash:0xf40000(root),0xc0000(uboot)ro
CASset=min
MALLOC_len=1
ethprime=egiga0
bootargs_root=root=/dev/nfs rw
bootargs_end=:::DB88FXX81:eth0:none
image_name=uImage
standalone=fsload 0x2000000 $(image_name);setenv bootargs $(console) root=/dev/mtdblock0 rw ip=$(ipaddr):$(serverip)$(bootargs_end) $(mvPhoneConfig); bootm 0x2000000;
ethaddr=00:08:XX:XX:XX:XX
mvPhoneConfig=mv_phone_config=dev0:fxs,dev1:fxo
mvNetConfig=mv_net_config=(00:11:88:0f:62:81,0:1:2:3),mtu=1500
usb0Mode=host
yuk_ethaddr=00:00:00:EE:51:81
netretry=no
rcvrip=169.254.100.100
loadaddr=0x02000000
autoload=no
ethact=egiga0
update=tftp 0x800000 uImage; tftp 0xa00000 rootfs.gz;bootm 0x800000
filesize=36464c
fileaddr=A00000
bootcmd=uart1 0x68;cp.l 0xf8200000 0x800000 0x80000;cp.l 0xf8400000 0xa00000 0x240000;bootm 0x800000
ipaddr=172.17.21.248
serverip=172.17.21.7
netmask=255.255.254.0
bootargs=console=ttyS0,115200 root=/dev/ram initrd=0xa00000,0x900000 ramdisk=32768
stdin=serial
stdout=serial
stderr=serial
mainlineLinux=no
enaMonExt=no
enaCpuStream=no
enaWrAllo=no
pexMode=RC
disL2Cache=no
setL2CacheWT=yes
disL2Prefetch=yes
enaICPref=yes
enaDCPref=yes
sata_dma_mode=yes
netbsd_en=no
vxworks_en=no
bootdelay=3
disaMvPnp=no
enaAutoRecovery=yes
bootp_vendor_class=F_TS-110
3. To modify the U-boot parameter, you can use fw_setenv command. Here is an example of how to change boot delay.
# fw_setenv bootdelay 5

Monday 18 February 2019

every Linux sysadmin should know

In a world bursting with new tools and diverse development environments, it's practically a necessity for any developer or engineer to learn some basic sysadmin commands. Specific commands and packages can help developers organize, troubleshoot, and optimize their applications and—when things go wrong—provide valuable triage information to operators and sysadmins.
Whether you are a new developer or want to manage your own application, the following 20 basic sysadmin commands can help you better understand your applications. They can also help you describe problems to sysadmins troubleshooting why an application might work locally but not on a remote host. These commands apply to Linux development environments, containers, virtual machines (VMs), and bare metal.

1. curl

curl transfers a URL. Use this command to test an application's endpoint or connectivity to an upstream service endpoint. curl can be useful for determining if your application can reach another service, such as a database, or checking if your service is healthy.
As an example, imagine your application throws an HTTP 500 error indicating it can't reach a MongoDB database:
$ curl -I -s myapplication:5000 HTTP/1.0 500 INTERNAL SERVER ERROR
The -I option shows the header information and the -s option silences the response body. Checking the endpoint of your database from your local desktop:
$ curl -I -s database:27017 HTTP/1.0 200 OK
So what could be the problem? Check if your application can get to other places besides the database from the application host:
$ curl -I -s https://opensource.com HTTP/1.1 200 OK
That seems to be okay. Now try to reach the database from the application host. Your application is using the database's hostname, so try that first:
$ curl database:27017 curl: (6) Couldn't resolve host 'database'
This indicates that your application cannot resolve the database because the URL of the database is unavailable or the host (container or VM) does not have a nameserver it can use to resolve the hostname.

2. python -m json.tool / jq

After you issue curl, the output of the API call may be difficult to read. Sometimes, you want to pretty-print the JSON output to find a specific entry. Python has a built-in JSON library that can help with this. You use python -m json.tool to indent and organize the JSON. To use Python's JSON module, pipe the output of a JSON file into the python -m json.tool command.
$ cat test.json {"title":"Person","type":"object","properties":{"firstName":{"type":"string"},"lastName":{"type":"string"},"age":{"description":"Age in years","type":"integer","minimum":0}},"required":["firstName","lastName"]}
To use the Python library, pipe the output to Python with the -m (module) option.
$ cat test.json | python -m json.tool {     "properties": {         "age": {             "description": "Age in years",             "minimum": 0,             "type": "integer"         },         "firstName": {             "type": "string"         },         "lastName": {             "type": "string"         }     },     "required": [         "firstName",         "lastName"     ],     "title": "Person",     "type": "object" }
For more advanced JSON parsing, you can install jq. jq provides some options that extract specific values from the JSON input. To pretty-print like the Python module above, simply apply jq to the output.
$ cat test.json | jq {   "title": "Person",   "type": "object",   "properties": {     "firstName": {       "type": "string"     },     "lastName": {       "type": "string"     },     "age": {       "description": "Age in years",       "type": "integer",       "minimum": 0     }   },   "required": [     "firstName",     "lastName"   ] }

3. ls

ls lists files in a directory. Sysadmins and developers issue this command quite often. In the container space, this command can help determine your container image's directory and files. Besides looking up your files, ls can help you examine your permissions. In the example below, you can't run myapp because of a permissions issue. When you check the permissions using ls -l, you realize that the permissions do not have an "x" in -rw-r--r--, which are read and write only.
$ ./myapp bash: ./myapp: Permission denied $ ls -l myapp -rw-r--r--. 1 root root 33 Jul 21 18:36 myapp
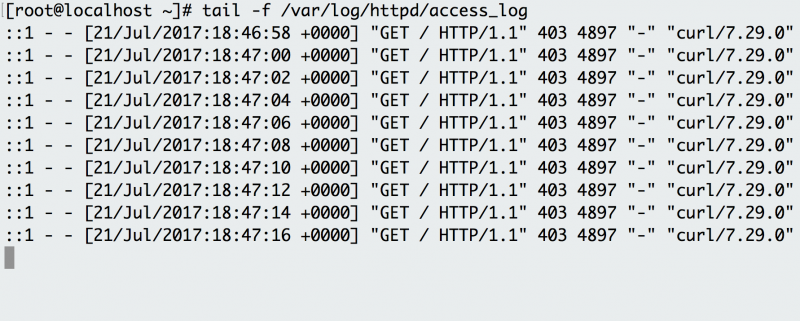
4. tail

tail displays the last part of a file. You usually don't need every log line to troubleshoot. Instead, you want to check what your logs say about the most recent request to your application. For example, you can use tail to check what happens in the logs when you make a request to your Apache HTTP server.

example_tail.png

Use tail -f to follow Apache HTTP server logs and see the requests as they happen.
Use tail -f to follow Apache HTTP logs and see the requests as they happen.
The -f option indicates the "follow" option, which outputs the log lines as they are written to the file. The example has a background script that accesses the endpoint every few seconds and the log records the request. Instead of following the log in real time, you can also use tail to see the last 100 lines of the file with the -n option.
$ tail -n 100 /var/log/httpd/access_log

5. cat

cat concatenates and prints files. You might issue cat to check the contents of your dependencies file or to confirm the version of the application that you have already built locally.
$ cat requirements.txt flask flask_pymongo
The example above checks whether your Python Flask application has Flask listed as a dependency.

6. grep

grep searches file patterns. If you are looking for a specific pattern in the output of another command, grep highlights the relevant lines. Use this command for searching log files, specific processes, and more. If you want to see if Apache Tomcat starts up, you might become overwhelmed by the number of lines. By piping that output to the grep command, you isolate the lines that indicate server startup.
$ cat tomcat.log | grep org.apache.catalina.startup.Catalina.start 01-Jul-2017 18:03:47.542 INFO [main] org.apache.catalina.startup.Catalina.start Server startup in 681 ms

7. ps

ps shows process status. Use this command to determine a running application or confirm an expected process. For example, if you want to check for a running Tomcat web server, you use ps with its options to obtain the process ID of Tomcat.
$ ps -ef UID        PID  PPID  C STIME TTY          TIME CMD root         1     0  2 18:55 ?        00:00:02 /docker-java-home/jre/bi root        59     0  0 18:55 pts/0    00:00:00 /bin/sh root        75    59  0 18:57 pts/0    00:00:00 ps -ef
For even more legibility, use ps and pipe it to grep.
$ ps -ef | grep tomcat root         1     0  1 18:55 ?        00:00:02 /docker-java-home/jre/bi

8. env

env allows you to set or print the environment variables. During troubleshooting, you may find it useful for checking if the wrong environment variable prevents your application from starting. In the example below, this command is used to check the environment variables set on your application's host.
$ env PYTHON_PIP_VERSION=9.0.1 HOME=/root DB_NAME=test PATH=/usr/local/bin:/usr/local/sbin LANG=C.UTF-8 PYTHON_VERSION=3.4.6 PWD=/ DB_URI=mongodb://database:27017/test
Notice that the application is using Python3 and has environment variables to connect to a MongoDB database.

9. top

top displays and updates sorted process information. Use this tool to determine which processes are running and how much memory and CPU they consume. A common case occurs when you run an application and it dies a minute later. First, you check the application's return error, which is a memory error.
$ tail myapp.log Traceback (most recent call last): MemoryError
Is your application really out of memory? To confirm, use top to determine how much CPU and memory your application consumes. When issuing top, you notice a Python application using most of the CPU, with its memory usage climbing, and suspect it is your application. While it runs, you hit the "C" key to see the full command and reverse-engineer if the process is your application. It turns out to be your memory-intensive application (memeater.py). When your application has run out of memory, the system kills it with an out-of-memory (OOM) error.

example_top.png

Issuing top against an application that consumes all of its memory.
The memory and CPU usage of the application increases, eventually being OOM-killed.

example_topwithc.png

Pressing C while running top shows the full command
By hitting the "C" key, you can see the full command that started the application.
In addition to checking your own application, you can use top to debug other processes that utilize CPU or memory.

10. netstat

netstat shows the network status. This command shows network ports in use and their incoming connections. However, netstat does not come out-of-the-box on Linux. If you need to install it, you can find it in the net-tools package. As a developer who experiments locally or pushes an application to a host, you may receive an error that a port is already allocated or an address is already in use. Using netstat with protocol, process and port options demonstrates that Apache HTTP server already uses port 80 on the below host.

example_netstat.png

netstat verifies that Apache is running on port 80
Using netstat -tulpn shows that Apache already uses port 80 on this machine.

11. ip address

If ip address does not work on your host, it must be installed with the iproute2 package. ip address shows the interfaces and IP addresses of your application's host. You use ip address to verify your container or host's IP address. For example, when your container is attached to two networks, ip address can show which interface connects to which network. For a simple check, you can always use the ip address command to get the IP address of the host. The example below shows that the web tier container has an IP address of 172.17.0.2 on interface eth0.

example_ipaddr_0.png

ip address shows that the IP address of eth0 is 172.17.0.2
Using ip address shows that the IP address of the eth0 interface is 172.17.0.2

12. lsof

lsof lists the open files associated with your application. On some Linux machine images, you need to install lsof with the lsof package. In Linux, almost any interaction with the system is treated like a file. As a result, if your application writes to a file or opens a network connection, lsof will reflect that interaction as a file. Similar to netstat, you can use lsof to check for listening ports. For example, if you want to check if port 80 is in use, you use lsof to check which process is using it. Below, you can see that httpd (Apache) listens on port 80. You can also use lsof to check the process ID of httpd, examining where the web server's binary resides (/usr/sbin/httpd).

example_lsof.png

lsof reveals the origin of process information
Lsof shows that httpd listens on port 80. Examining httpd's process ID also shows all the files httpd needs in order to run.
The name of the open file in the list of open files helps pinpoint the origin of the process, specifically Apache.

13. df

You can use df (display free disk space) to troubleshoot disk space issues. When you run your application on a container orchestrator, you might receive an error message signaling a lack of free space on the container host. While disk space should be managed and optimized by a sysadmin, you can use df to figure out the existing space in a directory and confirm if you are indeed out of space.

example_df.png

df shows all of the disk space available on the host
Df shows the disk space for each filesystem, its absolute space, and availability.
The -h option prints out the information in human-readable format. The example above shows plenty of disk space on this host.

14. du

To retrieve more detailed information about which files use the disk space in a directory, you can use the du command. If you wanted to find out which log takes up the most space in the /var/log directory, for example, you can use du with the -h (human-readable) option and the -s option for the total size.
$ du -sh /var/log/* 1.8M  /var/log/anaconda 384K  /var/log/audit 4.0K  /var/log/boot.log 0 /var/log/chrony 4.0K  /var/log/cron 4.0K  /var/log/maillog 64K /var/log/messages
The example above reveals the largest directory under /var/log to be /var/log/audit. You can use du in conjunction with df to determine what utilizes the disk space on your application's host.

15. id

To check the user running the application, use the id command to return the user identity. The example below uses Vagrant to test the application and isolate its development environment. After you log into the Vagrant box, if you try to install Apache HTTP Server (a dependency) the system states that you cannot perform the command as root. To check your user and group, issue the id command and notice that you are running as the "vagrant" user in the "vagrant" group.
$ yum -y install httpd Loaded plugins: fastestmirror You need to be root to perform this command. $ id uid=1000(vagrant) gid=1000(vagrant) groups=1000(vagrant) context=unconfined_u:unconfined_r:unconfined_t:s0-s0:c0.c1023
To correct this, you must run the command as a superuser, which provides elevated privileges.

16. chmod

When you run your application binary for the first time on your host, you may receive the error message "permission denied." As seen in the example for ls, you can check the permissions of your application binary.
$ ls -l total 4 -rw-rw-r--. 1 vagrant vagrant 34 Jul 11 02:17 test.sh
This shows that you don't have execution rights (no "x") to run the binary. chmod can correct the permissions to enable your user to run the binary.
$ chmod +x test.sh [vagrant@localhost ~]$ ls -l total 4 -rwxrwxr-x. 1 vagrant vagrant 34 Jul 11 02:17 test.sh
As demonstrated in the example, this updates the permissions with execution rights. Now when you try to execute your binary, the application doesn't throw a permission-denied error. Chmod may be useful when you load a binary into a container as well. It ensures that your container has the correct permissions to execute your binary.

17. dig / nslookup

A domain name server (DNS) helps resolve a URL to a set of application servers. However, you may find that a URL does not resolve, which causes a connectivity issue for your application. For example, say you attempt to access your database at the mydatabase URL from your application's host. Instead, you receive a "cannot resolve" error. To troubleshoot, you try using dig (DNS lookup utility) or nslookup (query Internet name servers) to figure out why the application can't seem to resolve the database.
$ nslookup mydatabase Server:   10.0.2.3 Address:  10.0.2.3#53 ** server can't find mydatabase: NXDOMAIN
Using nslookup shows that mydatabase can't be resolved. Trying to resolve with dig yields the same result.
$ dig mydatabase ; <<>> DiG 9.9.4-RedHat-9.9.4-50.el7_3.1 <<>> mydatabase ;; global options: +cmd ;; connection timed out; no servers could be reached
These errors could be caused by many different issues. If you can't debug the root cause, reach out to your sysadmin for more investigation. For local testing, this issue may indicate that your host's nameservers aren't configured appropriately. To use these commands, you will need to install the BIND Utilities package.

18. iptables

iptables blocks or allows traffic on a Linux host, similar to a network firewall. This tool may prevent certain applications from receiving or transmitting requests. More specifically, if your application has difficulty reaching another endpoint, iptables may be denying traffic to the endpoint. For example, imagine your application's host cannot reach Opensource.com. You use curl to test the connection.
$ curl -vvv opensource.com * About to connect() to opensource.com port 80 (#0) *   Trying 54.204.39.132... * Connection timed out * Failed connect to opensource.com:80; Connection timed out * Closing connection 0 curl: (7) Failed connect to opensource.com:80; Connection timed out
The connection times out. You suspect that something might be blocking the traffic, so you show the iptables rules with the -S option.
$ iptables -S -P INPUT DROP -P FORWARD DROP -P OUTPUT DROP -A INPUT -p tcp -m tcp --dport 22 -j ACCEPT -A INPUT -i eth0 -p udp -m udp --sport 53 -j ACCEPT -A OUTPUT -p tcp -m tcp --sport 22 -j ACCEPT -A OUTPUT -o eth0 -p udp -m udp --dport 53 -j ACCEPT
The first three rules show that traffic drops by default. The remaining rules allow SSH and DNS traffic. In this case, follow up with your sysadmin if you require a rule to allow traffic to external endpoints. If this is a host you use for local development or testing, you can use the iptables command to allow the correct traffic. Use caution when adding rules that allow traffic to your host.

19. sestatus

You usually find SELinux (a Linux security module) enforced on an application host managed by an enterprise. SELinux provides least-privilege access to processes running on the host, preventing potentially malicious processes from accessing important files on the system. In some situations, an application needs to access a specific file but may throw an error. To check if SELinux blocks the application, use tail and grep to look for a "denied" message in the /var/log/audit logging. Otherwise, you can check to see if the box has SELinux enabled by using sestatus.
$ sestatus SELinux status:                 enabled SELinuxfs mount:                /sys/fs/selinux SELinux root directory:         /etc/selinux Loaded policy name:             targeted Current mode:                   enforcing Mode from config file:          enforcing Policy MLS status:              enabled Policy deny_unknown status:     allowed Max kernel policy version:      28
The output above indicates that the application's host has SELinux enabled. On your local development environment, you can update SELinux to be more permissive. If you need help with a remote host, your sysadmin can help you determine the best practice for allowing your application to access the file it needs.

20. history

When you issue so many commands for testing and debugging, you may forget the useful ones! Every shell has a variant of the history command. It shows the history of commands you have issued since the start of the session. You can use history to log which commands you used to troubleshoot your application. For example, when you issue history over the course of this article, it shows the various commands you experimented with and learned.
$ history     1  clear     2  df -h     3  du
What if you want to execute a command in your previous history, but you don't want to retype it? Use ! before the command number to re-execute.

example_history.png

Re-execute a command in your history
Adding ! before the command number you want to execute issues the command again.
Basic commands can enhance your troubleshooting expertise when determining why your application works in one development environment but perhaps not in another. Many sysadmins leverage these commands to debug problems with systems. Understanding some of these useful troubleshooting commands can help you communicate with sysadmins and resolve issues with your application.

Friday 15 February 2019

crash your Linux system: Dangerous Commands

inux commands can be very dangerous when not used properly. It makes you a hero and zero in a second. Without proper knowledge one can easily destroy their system in seconds and we know internet is full of trolls, so having knowledge of these dangerous commands can be useful for beginners.
NOTE: If someone give you advice to execute a gibberish command and you don't know about that, then you can easily check it via explain shell.
Here's a list of some of the dangerous commands that can harm your system or completely destroy them:

1. Deletes everything recursively

The most dangerous command will delete everything from your system.
## delete root directory entirely
$ rm -rf /
Bash
And the other variations of this command are:
## delete the home folder
$ rm -rf ~
## delete everything from current folder
$ rm -rf *
## delete all your configuration files
$ rm -rf .*
Bash

2. Fork Bomb Command :(){ :|: & };:

This weird looking command will create endless copies of itself which will cause your system to hang and may result in corruption of data.
$ :(){ :|: & };:
Bash

3. Format entire hard drive

$ mkfs.ext4 /dev/sda1
Bash
This command will reformat your entire hard drive using ext4 filesystem. Here /dev/sda1 is the path of first partition.
Other variation of this command is mkfs.ext3.

4. Flushing the hard drive.

$ anybashcommand > /dev/sda
Bash
It writes directly to primary hard drive and therefore crash all the data with raw buffer data.

5. Fill your hard drive with zero's

$$ dd if=/dev/zero of=/dev/hda
Bash
Here dd performs low level copying from one location to another, where if=/dev/zero produce infinite streams of zero in /dev/hda.

6. Creating a black hole in hard drive.

$ mv / /dev/null
Bash
Here '/dev/null' is a special location in hard disk which can be think as a black hole. Everything you put into it will be dissolved.

7. Delete superuser

$ rm -f /usr/bin/sudo;rm -f /bin/su
Bash
It will revoke superuser access from root user and thereby unable to perform any root privileges command.

8. Delete boot directory

$ rm -rf /boot
Bash
The boot directory is used for system startup, kernal loading etc. Deleting it will unable to perform any system startup and thereby crash linux.

Tuesday 5 February 2019

Kali Linux Metapackages

One of our goals when developing Kali Linux was to provide multiple metapackages that would allow us to easily install subsets of tools based on their particular needs. Until recently, we only had a handful of these meta packages but we have since expanded the metapackage list to include far more options:
  • kali-linux
  • kali-linux-all
  • kali-linux-forensic
  • kali-linux-full
  • kali-linux-gpu
  • kali-linux-pwtools
  • kali-linux-rfid
  • kali-linux-sdr
  • kali-linux-top10
  • kali-linux-voip
  • kali-linux-web
  • kali-linux-wireless
These metapackages allow for easy installation of certain tools in a specific field, or alternatively, for the installation of a full Kali suite. All of the Kali metapackages follow a particular naming convention, starting with “kali-linux” so if you want to see which metapackages are available, you can search for them as follows:
apt-get update && apt-cache search kali-linux
Although we tried to make the metapackage names self-explanatory, we are limited in the practical length we can use, so let’s take a brief look at each of them and see how much disk space is used by each one:
kali-linux
The kali-linux metapackage is a completely bare-bones installation of Kali Linux and includes various network services such as Apache and SSH, the Kali kernel, and a number of version control applications like git, svn, etc. All of the other metapackages listed below also contain kali-linux.
Installation Size: 1.5 GB
kali-linux-full
When you download a Kali Linux ISO, you are essentially downloading an installation that has the kali-linux-full metapackage installed. This package includes all of the tools you are familiar with in Kali.
Installation Size: 9.0 GB
kali-linux-all
In order to keep our ISO sizes reasonable, we are unable to include every single tool that we package for Kali and there are a number of tools that are not able to be used depending on hardware, such as various GPU tools. If you want to install every available Kali Linux package, you can install the kali-linux-all metapackage.
Installation Size: 15 GB
kali-linux-top10
In Kali Linux, we have a sub-menu called “Top 10 Security Tools”. The kali-linux-top10 metapackage will install all of these tools for you in one fell swoop.
Installation Size: 3.5 GB
top10-menu
kali-linux-forensic
If you are doing forensics work, you don’t want your analysis system to contain a bunch of unnecessary tools. To the rescue comes the kali-linux-forensic metapackage, which only contains the forensics tools in Kali.
Installation Size: 3.1 GB
kali-linux-gpu
GPU utilities are very powerful but need special hardware in order to function correctly. For this reason, they are not included in the default Kali Linux installation but you can install them all at once with kali-linux-gpu and get cracking.
Installation Size: 4.8 GB
kali-linux-pwtools
The kali-linux-pwtools metapackage contains over 40 different password cracking utilities as well as the GPU tools contained in kali-linux-gpu.
Installation Size: 6.0 GB
kali-linux-rfid
For our users who are doing RFID research and exploitation, we have the kali-linux-rfid metapackage containing all of the RFID tools available in Kali Linux.
Installation Size: 1.5 GB
kali-linux-sdr
The kali-linux-sdr metapackage contains a large selection of tools for your Software Defined Radio hacking needs.
Installation Size: 2.4 GB
kali-linux-voip
Many people have told us they use Kali Linux to conduct VoIP testing and research so they will be happy to know we now have a dedicated kali-linux-voip metapackage with 20+ tools.
Installation Size: 1.8 GB
kali-linux-web
Web application assessments are very common in the field of penetration testing and for this reason, Kali includes the kali-linux-web metapackage containing dozens of tools related to web application hacking.
Installation Size: 4.9 GB
kali-linux-wireless
Like web applications, many penetration testing assessments are targeted towards wireless networks. The kali-linux-wireless metapackage contains all the tools you’ll need in one easy to install package.
Installation Size: 6.6 GB
To see the list of tools included in a metapackage, you can use simple apt commands. For example, to list all the tools included in the kali-linux-web metapackage, we could:
apt-cache show kali-linux-web |grep Depends