1. Do: Use the real Jenkins Pipeline
Don't use older plugins like Build Pipeline plugin or Buildflow plugin. Instead, use the real Jenkins Pipeline suite of plugins .
- Why? The Pipeline plugin is a step change improvement in the underlying job itself. Unlike freestyle jobs, Pipeline is resilient to Jenkins master restarts and also has` built-in features that supersede many older plugins previously used to build multi-step, complex delivery pipelines.
More information on getting started is available at https://jenkins.io/solutions/pipeline/ .
2. Do: Develop your pipeline as code
Use the feature to store your Jenkinsfile in SCM then version and test it like you do other software.
- Why? Treating your pipeline as code enforces good discipline and also opens up a new world of features and capabilities like multi-branch, pull request detection and organization scanning for GitHub and BitBucket.
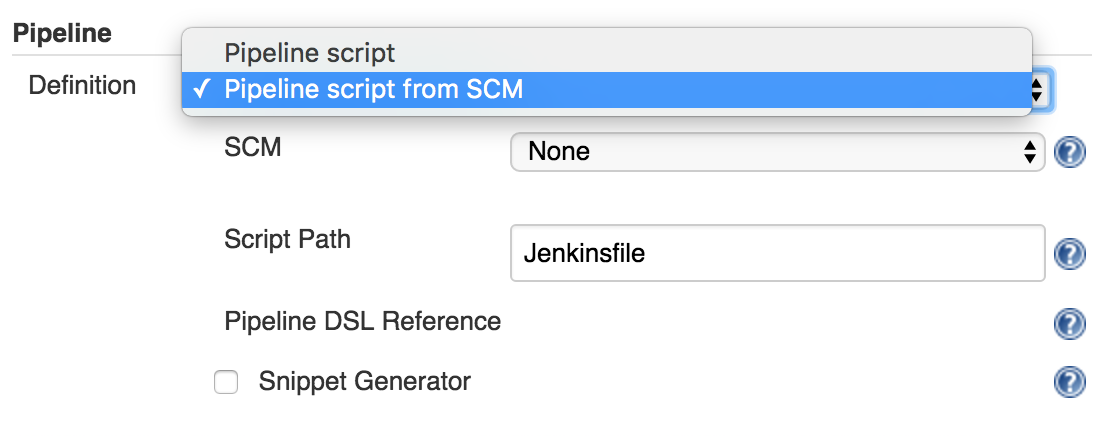
You should also call your Pipeline script the default name: Jenkinsfile and start the following script header, so your IDE, GitHub and other tooling recognize it as Groovy and enable code highlighting:
#!groovy
3. Do: All work within a stage
Any non-setup work within your pipeline should occur within a stage block.
- Why? Stages are the logical segmentation of a pipeline. Separating work into stages allows separating your pipeline into distinct segments of work.
Example:
stage 'build'
//build
stage 'test'
//test
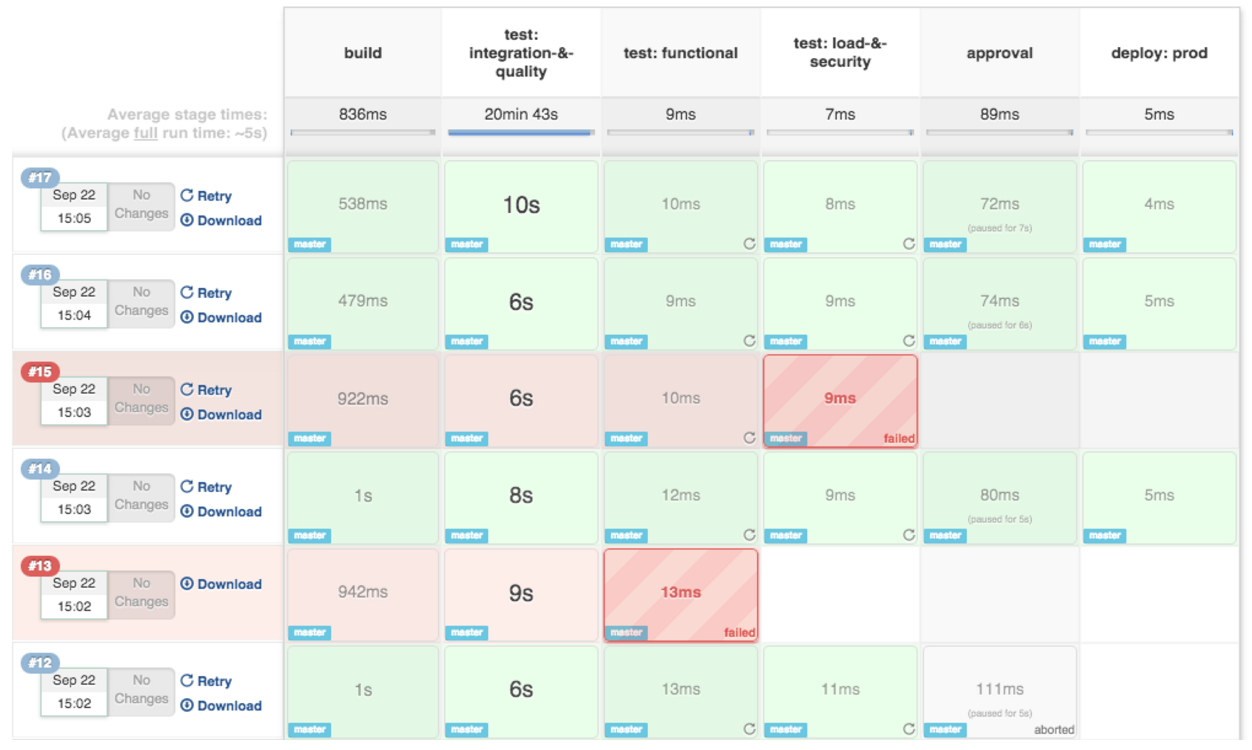
And better still: the Pipeline Stage View plugin visualizes stages as unique segments of the pipeline:
4. Do: All material work within a node
Any material work within a pipeline should occur within a node block.
- Why? By default, the Jenkinsfile script itself runs on the Jenkins master, using a lightweight executor expected to use very few resources. Any material work, like cloning code from a Git server or compiling a Java application, should leverage Jenkins distributed builds capability and run an agent node.
Example:
stage 'build'
node{
    checkout scm
    sh 'mvn clean install'
}
5. Do: Work you can within a parallel step
Pipeline offers a straight-forward syntax for branching your pipeline into parallel steps. Use it!
- Why? Branching work in parallel will allow your pipeline to run faster, shifting your pipeline steps to the left, and getting feedback to developers and the rest of your team faster.
Example:
parallel 'shifting':{
    //everything
}, 'left':{
    //I can
}
Bonus tip: use the Parallel Test Executor plugin to have Jenkins automatically determine how to run your xUnit compatible tests in optimally parallel buckets! Read more information on Parallel Test Execution on the CloudBees Blog .
6. Do: Acquire nodes within parallel steps
Why? One of the main benefits of parallelism in a pipeline is: to do more material work (see Best Practice #4)! You should generally aim to acquire a node within the parallel branches of your pipeline.
Example:
parallel 'integration-tests':{
    node('mvn-3.3'){ ... }
}, 'functional-tests':{
    node('selenium'){ ... }
}
7. Don't: Use input within a node block
While you can put an input statement within a node block, you definitely shouldn't.
- Why? The input element pauses pipeline execution to wait for an approval - either automated or manual. Naturally these approvals could take some time. The node element, on the other hand, acquires and holds a lock on a workspace and heavy weight Jenkins executor - an expensive resource to hold onto while pausing for input.
So, create your inputs outside your nodes.
Example:
stage 'deployment'
input 'Do you approve deployment?'
node{
    //deploy the things
}
8. Do: Wrap your inputs in a timeout
Pipeline has an easy mechanism for timing out any given step of your pipeline. As a best practice, you should always plan for timeouts around your inputs.
- Why? For healthy cleanup of the pipeline, that's why. Wrapping your inputs in a timeout will allow them to be cleaned-up (i.e., aborted) if approvals don't occur within a given window.
Example:
timeout(time:5, unit:'DAYS') {
    input message:'Approve deployment?', submitter: 'it-ops'
}
9. Don't: Set environment variables with env global variable
While you can edit some settings in the env global variable, you should use the withEnv syntax instead.
- Why? because the env variable is global, changing it directly is discouraged as it changes the environment globally, so the withEnv syntax is recommended.
Example:
withEnv(["PATH+MAVEN=${tool 'm3'}/bin"]) {
    sh "mvn clean verify"
}
10. Do: Prefer stashing files to archiving
Before the stash capability was added to Pipeline DSL, archives were the best way to share files between nodes or stages in a pipeline. If you just need to share files between stages and nodes of your pipeline, you should use stash/unstash instead of archive.
- Why? Stash and unstash are designed for sharing files, for example your application's source code, between stages and nodes. Archives, on the other hand, are designed for longer term file storage (e.g., intermediate binaries from your builds).
Example:
stash excludes: 'target/', name: 'source'
unstash 'source'
Summary
Thanks for reading! The new Jenkins Pipeline plugin is gaining more and more traction, especially with the launch of Jenkins 2.0 . I'm sure there will be more and more best practices to come as developers across the world develop their DevOps pipelines with Jenkins. We will post follow-up blogs and more examples soon!