Friday 6 May 2016

Top 10 Picks for Raspberry Pi Sensors for your Projects

Top 10 Picks for Raspberry Pi Sensors for your Projects

By R THEJESWARAREDDYThe Top Raspberry Pi Sensors for your Projects

Sensors are the way a Raspberry Pi communicates and sees the world and can be necessary depending on the project you have planned.

The popularity of the Raspberry Pi gives it many pre-made sensors ready to do whatever job is thrown its way.

There are whole sensor kits that can be bought such as the following, or singly as listed below.
SunFounder 37 modules Raspberry Pi Sensor Kit, 26-Pin GPIO Extension Board Jump wires


Our Top 10 Picks for Raspberry Pi Sensors for your Projects

1…
Raspberry PI 5MP Camera Board Module

Integrating a camera with a RasPi with small camera modules can be done with cameras such as this popular 5MP camera. If you want to setup a surveillance system, baby monitor, IP cam and so on then this is a good option. The camera plugs into a RasPi with a ribbon cable and than software setup to use it. The software setup may be moderately difficult depending on your skills but the good news is like many Raspberry Pi projects there is plenty of documentation.


2…
Leaning Tech SX300 Expansion Board for Raspberry PI B+ Designed for Ease of Use

The SX300 Expansion Board for Raspberry PI is a way to add Bluetooth, Microphone input, stereo audio output, WiFi, RTC, IR receiver, SATA and More. It was designed for use with the Raspberry Pi B+ but also works with the Raspberry Pi 2. There are other expansion boards to use with a RasPi that give it features that are not pre-built in.


3…
365buying DS18B20 Temperature Sensor – Waterproof Digital Thermal Probe Sensor DS18B20

Reading temperatures can be done with a temperature sensor. A few resistors maybe necessary depending what you are reading the temperature of basically adjusting the sensitivity.


4…
5 inch 800*480 Resistive Touch Screen HDMI interface Raspbian LCD compatible with Raspberry Pi (Pi 2) Model B B+ A+ Video Photo Display System Module @XYG

Having a small portable screen that works with a RasPi has many uses. There are many different types of screens created for the RasPi even touchscreen models like the one above.


5…
Vktech Home Appliance DHT22/AM2302 Digital Temperature And Humidity Measurement Sensor

For weather station projects here is a sensor that can read humidity and temperature.


6…
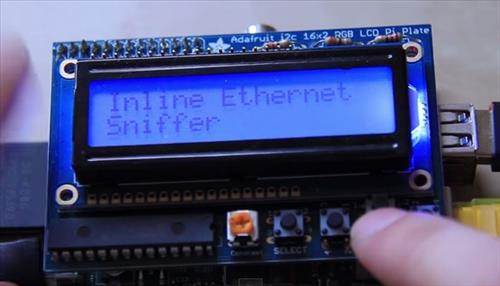
Adafruit RGB Positive 16×2 Lcd+keypad Kit for Raspberry Pi

Simple character LCD can be bought for projects that don’t require lots of video. Here is one being used to monitor a network.


7…
Happu-store Infrared PIR Motion Sensor Module New HC-SR501for Arduino Raspberry pi

Small Infrared Motion Sensor can be hooked up to a RasPi.


8…
Wavesahre MQ-2 Gas Sensor Module LP,Propane,Hydrogen Detection Sensor Gas Detector Sensor Module for Arduino Raspberry pi

Gas detectors can be interfaced to detect a range of gases.


9…
JBtek® 2 pcs nRF24L01+ 2.4GHz Antenna Wireless Transceiver RF Transceiver Module ISM – Arduino & Raspberry Pi Compatible

Wireless RF Transceivers can be hooked up to a RasPi.


10…
JBtek Raspberry Pi Bluetooth 4.0 USB adapter – For Windows 8 / Windows 7 / Vista

A simple Bluetooth dongle can be used for any bluetooth device to interface with a RasPi.

Quadcopter Basics

Quadcopter Basics

Having attracted towards flying machines from my childhood, I always wanted to make a copter or some flying machine for myself. So I decided to learn some basics for building one. I went through some stuff on the internet and found a Quadcopter would be cool !
In here let us see what a quadcopter is and its basics. There are different models of quadcopters. But to begin with let us see a simple model.The below image shows one.
Basically a Quadcopter is a quadrotor helicopter that is lifted and propelled by four rotors. Unlike helicopters they use symmetrically pitched blades. Control of vehicle motion is achieved by altering the pitch and/or rotation rate of one or more rotor discs, thereby changing its torque load and thrust/lift characteristics. Check the image below for the principle behind the quad’s motion.
As you can see, the motors 1 and 4 rotate in CW direction while 3 and 2 rotate CCW thus creating a downward thrust which lifts the quad. By varying the speed of the 4 rotors various movements are possible. There are three important terms mentioned above namely the YAW , ROLL and PITCH which we must have a clear concept of before understanding the quad’s movement.
Here Yaw = Rudder , Roll = Aileron and Pitch = Elevator. Having these in mind, Look at the following image to get knowledge of the various motions of the quadcopter.
Check the notes section of the above image for the motor control mechanism for particular movement of quad.
Having done with the basic quad’s principle and movement, Lets us see what are the basic parts necessary to construct a quadcopter.
Frame :
This is the most basic and important part of the quadcopter. You can mount your brushless motors, power cells and other electronic equipement on it easily. You can even create your own frame. Just make sure your frame is firm and stable.
Brushless Motors :
Brushless motors are commonly used in RC. Brushless motors have three wires. These wires control the motor’s three phases. When connecting the motor to it’s ESC (Electronic Speed Controller), it doesn’t actually matter how you connect the wires to let it spin because you want two motors to rotate CW and other two to rotate CCW. So it is just by trail and error method you fix these wires.
Electronic Speed Controller (ESC) :
The three-phased brushless motor are controlled by the Electronic Speed Controller (ESC). The ESC has three pairs of wires: current supply(2 thick) / motor wires (3 thick) / controller wire (3 small).
Propellers :
For your quadcopter, you’ll need a equal numbers of CW (clowckwise) and CCW (counter-clockwise) propellers. This will ensure that your copter will not spin around.
Control Board :
A multicopter control board is the essential part of your multicopter. It’s the heart of the copter and controls the motor’s independently and corrects for equal balancing.
Transmitter and Receiver :
You will need a transmitter and a receiver to control you copter. There are a wide variety of channels of transmitter available. Four channels is enough for a multicopter in general.
Batteries : Lithium Polymer batteries are used for powering your multicopter. LiPo batteries are available in wide range. The one that fits your need can be used.
So that is all you need to create a Quadcopter. I’m will post the construction of my quad as soon as I complete it.:) Check Videos of quadcopter on Youtube. There are various stunts that can be performed with these😀

PLAY AUDIO ON A BLUETOOTH SPEAKER WITH RASPBERRY PI 3

PLAY AUDIO ON A BLUETOOTH SPEAKER WITH RASPBERRY PI 3

Make use of the Raspberry Pi 3’s brand new Bluetooth capabilities to play audio and/or music over a wireless speaker, without using a dongle!
An oft-requested feature, Bluetooth support on the Raspberry Pi 3 board – along with its wireless LAN capability – has been pretty well received in the Pi and maker communities at large. How can you use it, though?
In this tutorial, we’ll cover the basics of how to get your Bluetooth up and running on the Pi 3, and how to connect to a Bluetooth speaker so you can play all your smooth Sonic Pi tunes that you’ve been learning from Sam Aaron’s tutorials.
STEP-01 Set up the Raspberry Pi
While Bluetooth is on the Raspberry Pi 3, you need to install a few bits of software to make sure it works properly. It’s best to start by making sure your version of Raspbian Jessie (this won’t work on Wheezy) is up to date. Open the terminal and begin with:
Follow this up by installing the Raspberry Pi Bluetooth software and the excellent Blueman Bluetooth manager:
You may need to reboot after this, but you’ll probably be fine to carry on to the next step.
STEP-02 Set up your Bluetooth speaker
Make sure your Bluetooth speaker is all charged up and ready to go, then switch it on. Ours has a satisfying beep once you do so. If there’s a syncing button or sequence for it to start searching to pair with devices, press it/do it and head back to the Raspberry Pi. If you want to check whether the speaker is actually looking, you could always find out if a mobile phone or tablet is able to see it. Don’t pair with it, though, as that might cause problems in the future.
STEP-03 Connect the speaker up
Open up Blueman by going to the program menu, Preferences, and Bluetooth Manager. As long as the speaker is still trying to sync, clicking Search should make it show up in the interface. Right-click on it, then hit Pair. It should connect to the device, shown by a few information bars on the connection strength – if it then suddenly disconnects straight afterwards, you may need to right-click on it again and hit Connect. Test it out by playing a video on YouTube; it may work straight away like this!
STEP-04 More setup
Depending on how your Pi is set up, the Bluetooth audio might not work at step 3. If this is the case, it’s best to install some extra software to try to get it working. Open up the terminal again and install PulseAudio and its Bluetooth module:
If you open the PulseAudio panel now, it may not show much information, especially whether or not you can switch to the Bluetooth speaker. You’ll more than likely need to reboot the Raspberry Pi – do that now!
STEP-05 Connecting with PulseAudio
After the Raspberry Pi has booted back up, check the Volume Control option in the Sound & Video category of the program menu. On output devices, it should list bcm2835 ALSA as the default output. Go and connect or re-pair with the Bluetooth audio device and it should then be picked up as an option in the Volume Control. Try playing a YouTube video again: you may need to mute ALSA and set the Bluetooth device as a fallback, but it should start playing the audio!
STEP-06 Bluetooth uses
There are some quite obvious uses for Bluetooth speaker connections: not all monitors have audio out, so this solves that issue. This means videos, games, and music (especially the kind from Sonic Pi) are now available to you. You could also incorporate it into a project and create an internet radio player for yourself, activated with the touch of a button. It could be used in a scary Halloween decoration that houses multiple screams and whispers. There’s a lot you can do with this new functionality!