Thursday 31 March 2016

GPIO Zero and Raspberry Pi programming starter projects

GPIO Zero and Raspberry Pi programming starter projects
kids in a classroom learning about Raspberry Pi programming


One of the most exciting starter activities to do with a Raspberry Pi is something you can't do on your regular PC or laptop—make something happen in the real world, such as flash an LED or control a motor. If you've done anything like this before, you probably did it with Python using the RPi.GPIO library, which has been used in countless projects. There's now an even simpler way to interact with physical components: a new friendly Python API called GPIO Zero.
Programming Raspberry Pi
Photo by Giles Booth. Used with permission
I recently wrote about Raspberry Pi Zero, the $5 computer and latest edition to the world of affordable hardware. Although the names are similar, the GPIO Zero and Raspberry Pi Zero projects are unrelated and are not coupled. The GPIO Zero library is made to work on all Raspberry Pi models, and is compatible with both Python 2 and Python 3.
The RPi.GPIO library is bare bones and provides all the essential functionality to do simple things with the Pi's GPIO pins—set up pins as inputs or outputs, read inputs, set outputs high or low, and so on. GPIO Zero is built on top of this and provides a collection of simple interfaces to everyday components, so rather than setting pin 2 high to turn on an LED, you have an LED object and you turn it on.
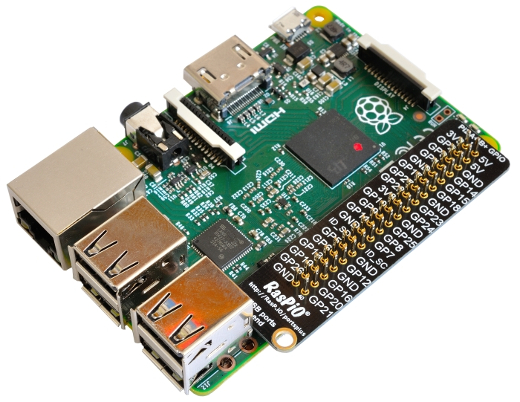
GPIO port label – from rasp.io/portsplus

Getting started

With GPIO Zero, you import the name of the interfaces you're using, for example: from gpiozero import LED Also you must correctly wire up any components you're using and connect them to the GPIO pins. Note that some pins are allocated to 3V3, 5V, and GND; a few are special purpose and the rest are general purpose. Refer to pinout.xyz for more information, or use a port label:
GPIO port label
Blink an LED with the following code:
from gpiozero import LED
from time import sleep

led = LED(17)

while True:
    led.on()
    sleep(1)
    led.off()
    sleep(1)
Alternatively, use the LED's blink() method, but make sure to keep the program alive with signal.pause() like so:
from gpiozero import LED
from signal import pause

led = LED(17)

led.blink()

pause()

Output devices

As well as a basic LED interface, with the methods on()off()toggle(), andblink(), GPIO Zero also provides classes for Buzzer and Motor, which work in a similar way:
from gpiozero import Buzzer, Motor
from time import sleep

buzzer = Buzzer(14)
motor = Motor(forward=17, backward=18)

while True:
    motor.forward()
    sleep(10)
    motor.backward()
    buzzer.beep()
    sleep(10)
    buzzer.off()
There also are interfaces for PWMLED (control the brightness rather than just on/off), and for RGB LED, which is an LED comprising red, green, and blue parts using the brightness of each to provide full color control.
There's even an interface for TrafficLights. Provide the pin numbers the red, amber, and green lights are connected to, then control with:
traffic lights
lights = TrafficLights(2, 3, 4)

lights.on()
lights.off()
lights.blink()
lights.green.on()
lights.red.on()
and so on.

Input devices

The simplest input device is a push button, and the interface provided makes it easy to control programs with button presses:
push button input device
from gpiozero import Button

button = Button(14)

while True:
    if button.is_pressed:
        print("Pressed")
Another way to use button pressed to control programs is to usewait_for_press:
button.wait_for_press()
print("pressed")
This halts the program until the button is pressed, then continues. Alternatively, rather than polling the button state, you can connect actions to button presses:
button.when_pressed = led.on
button.when_released = led.off
Here, the method led.on is passed in as the action to be run when the button is pressed, and led.off as the button is released. This means when the button is pressed, the LED comes on, and when it's released the LED goes off. In addition to using other GPIO Zero object methods, you can use custom functions:
def hello():
    print("Hello")

def bye():
    print("Bye")

button.when_pressed = hello
button.when_released = bye 
Now every time the button is pressed, the hello function is called and prints "Hello". When the button is released it prints "Bye".
The use of custom functions in this way can be a good way to run a set of GPIO instructions, such as a traffic lights sequence:
def sequence():
    lights.green.off()
    lights.amber.on()
    sleep(1)
    lights.amber.off()
    lights.red.on()
    sleep(20)
    lights.amber.on()
    sleep(1)
    lights.green.on()
    lights.amber.off()
    lights.red.off()

lights.green.on()
button.when_pressed = sequence
Now when the button is pressed, the traffic lights will go from green to red, then wait 20 seconds before turning back to red, in the usual way.

Sensors

Swapping out a button for another input device, such as a basic sensor, can open up a world of interesting projects. Instead of a button, use a motion sensor:
motion sensor
from gpiozero import MotionSensor

sensor = MotionSensor(15)
Then use sensor.if_motionsensor.wait_for_motion, andsensor.when_motion. There is a similar interface provided for LightSensor.

Analogue devices

The Raspberry Pi has no native analogue input pins, but you can easily connect up an ADC (analogue-to-digital converter) and access analogue input devices (such aspotentiometers) and read their value:
from gpiozero import MCP3008

pot = MCP3008()

while True:
    print(pot.value)
The potentiometer returns values from 0 to 1, which means you can connect them up to output devices easily:
from gpiozero import PWMLED, MCP3008

led = PWMLED(4)
pot = MCP3008()

while True:
    led.value = pot.value
Now the LED's brightness is controlled directly by the potentiometer value.
Alternatively, a clever feature of GPIO Zero allows you to directly connect two devices together without continuously updating inside a loop. Every output device has a source property, which can read an infinite generator of values. All devices (input and output) have a values property, which is an infinite generator, yielding the device's current value at all times:
from gpiozero import PWMLED, MCP3008

led = PWMLED(4)
pot = MCP3008()

led.source = pot.values
This works exactly the same as the previous example, just without the need for awhile loop.
You can connect multiple analogue inputs to the same ADC (the MCP3008 chip provides 8 channels). This example uses three potentiometers allowing control of each color channel in an RGB LED using the same method:
led = RGBLED(red=2, green=3, blue=4)
red_pot = MCP3008(channel=0)
green_pot = MCP3008(channel=1)
blue_pot = MCP3008(channel=2)

led.red.source = red_pot.values
led.green.source = green_pot.values
led.blue.source = blue_pot.values
This allows you to use the three potentiometers as a color mixer for the RGB LED.

Bundle interfaces

Like the TrafficLights interface, there are others for bundles of components, particularly for use in commonly used simple add-on boards.
Generic LED board or collection of LEDs, controlled together or individually:
from gpiozero import LEDBoard

lights = LEDBoard(2, 3, 4, 5, 6)
lights.on()
lights.off()
lights.leds[1].on()
lights.leds[3].toggle()
lights.leds[5].on()
lights.leds[2].blink()
lights.leds[4].blink()
The Ryanteck TrafficHAT:
Ryanteck TrafficHAT
from gpiozero import TrafficHat

hat = TrafficHat()

hat.on()
hat.off()
hat.lights.blink()
hat.buzzer.on()
hat.button.when_pressed = hat.lights.on
hat.button.when_released = hat.lights.off
Note that the TrafficHat interface did not require a set of pin numbers, because they are already defined within the class.
Connect up two motors and make a chassis and you have yourself a Raspberry Pi robot:
raspberry pi robot
from gpiozero import Robot

robot = Robot(left=(4, 14), right=(17, 18))

robot.forward()
robot.backward()
robot.reverse()
robot.left()
robot.forward()
robot.stop()

Zero all the things

Now that there's a suite of Zero-named projects, why not use them in conjunction? How about a Pi Zero-powered robot programmed with GPIO Zero and PyGame Zero?
GPIO Zero and PyGame Zero do work very well together—perfect for creating on-screen interfaces for GPIO components.
Pi Zero powered robot programmed with GPIO Zero and PyGame Zero
Photo by ItsAll_Geek2Me. Used with permission.

Try it now!

GPIO Zero has been included in the Raspbian Jessie image since December, so you can grab a copy from raspberrypi.org/downloads. If you have an older image, install it with:
sudo apt-get update
sudo apt-get install python3-gpiozero python-gpiozero
Open up IDLE and prototype in the REPL, or create a file to save your scripts. You can also use the regular Python shell, or install IPython and use that.

For More Interest go to bellow like:
http://gpiozero.readthedocs.org/en/v1.1.0/index.html

Thursday 24 March 2016

Install the ARM cross compiler toolchain on your Linux Ubuntu PC


This article illustrates how to install on a Ubuntu Linux PC the complete toolchain to cross compile the Linux Kernel, the Linux device drivers, the Linux applications and the boot loader like as AT91Bootstrap and its derivates like AcmeBoot and AriaBoot.
This procedure has been tested on Linux Ubuntu 15.04.

Install the Cross Compilers, utilities, etc.

Install the GCC, G++ cross compilers and support programs by typing:
$ sudo apt-get install libc6-armel-cross libc6-dev-armel-cross
$ sudo apt-get install binutils-arm-linux-gnueabi
$ sudo apt-get install libncurses5-dev
If you are using an Arietta, Aria or FOX board:
$ sudo apt-get install gcc-arm-linux-gnueabi
$ sudo apt-get install g++-arm-linux-gnueabi
If you are using an Acqua board:
$ sudo apt-get install gcc-arm-linux-gnueabihf
$ sudo apt-get install g++-arm-linux-gnueabihf
Now you are ready to cross-compile on your PC all the source available for the Acme Boards based on Atmel MPUs.

Try the cross C compiler

Let's try to cross compile a Hello World example in C and running it on an Acme board.
This is the example:
#include "stdio.h"
 
int main(void) {
  printf("Hello world !\n");
  return 0;
}
Compile it typing:
~$ arm-linux-gnueabi-gcc hello.c -o hello
As you can see we are using the ARM version of gcc just installed on your PC. It will generate an executable file for your Linux board.
Copy the executable file on the board via ssh:
~$ scp hello root@[your_board_ip]:/root
Then open a command session on your board and run the example:
~# ./hello
Hello world !

Try the cross C++ compiler

Let's try to cross compile a Hello World example in C++ and running it on an Acme board.
This is the example:
#include "iostream"
 
using namespace std;
 
int main(int argc, char *argv[]) {
    cout << "Hello world !" << endl;
    return 0;
}
Compile it typing:
~$ arm-linux-gnueabi-g++ hello.cc -o hello
As you can see we are using the ARM version of gcc just installed on your PC. It will generate an executable file for your Linux board.
Copy the executable file on the board via ssh:
~$ scp hello root@[your_board_ip]:/root
Then open a command session on your board and run the example:
~# ./hello
Hello world !

ONE MORE METHOD IS BELLOW ID FIRST ONE NOT WORKED THEN JUST GO FOR SECOND METHOD:

Cross compilation for ARM based Linux systems

This steps are tested on Ubuntu Linux 12.04, but should work for other Linux distributions. I case of other distributions package names and names of cross compilation tools may differ. There are several popular EABI versions that are used on ARM platform. This tutorial is written for gnueabi and gnueabihf, but other variants should work with minimal changes.

Prerequisites

  • Host computer with Linux;
  • Git;
  • CMake 2.6 or higher;
  • Cross compilation tools for ARM: gcc, libstc++, etc. Depending on target platform you need to choose gnueabi or gnueabihf tools. Install command for gnueabi:
    sudo apt-get install gcc-arm-linux-gnueabi
    
    Install command for gnueabihf:
    sudo apt-get install gcc-arm-linux-gnueabihf
    
  • pkgconfig;
  • Python 2.6 for host system;
  • [optional] ffmpeg or libav development packages for armeabi(hf): libavcodec-dev, libavformat-dev, libswscale-dev;
  • [optional] GTK+2.x or higher, including headers (libgtk2.0-dev) for armeabi(hf);
  • [optional] libdc1394 2.x;
  • [optional] libjpeg-dev, libpng-dev, libtiff-dev, libjasper-dev for armeabi(hf).

Getting OpenCV Source Code

You can use the latest stable OpenCV version available in sourceforge or you can grab the latest snapshot from our Git repository.

Getting the Latest Stable OpenCV Version

Getting the Cutting-edge OpenCV from the Git Repository

Launch Git client and clone OpenCV repository
In Linux it can be achieved with the following command in Terminal:
cd ~/<my_working _directory>
git clone https://github.com/Itseez/opencv.git

Building OpenCV

  1. Create a build directory, make it current and run the following command:
    cmake [<some optional parameters>] -DCMAKE_TOOLCHAIN_FILE=<path to the OpenCV source directory>/platforms/linux/arm-gnueabi.toolchain.cmake <path to the OpenCV source directory>
    
    Toolchain uses gnueabihf EABI convention by default. Add -DSOFTFP=ON cmake argument to switch on softfp compiler.
    cmake [<some optional parameters>] -DSOFTFP=ON -DCMAKE_TOOLCHAIN_FILE=<path to the OpenCV source directory>/platforms/linux/arm-gnueabi.toolchain.cmake <path to the OpenCV source directory>
    
    For example:
    cd ~/opencv/platforms/linux
    mkdir -p build_hardfp
    cd build_hardfp
    
    cmake -DCMAKE_TOOLCHAIN_FILE=../arm-gnueabi.toolchain.cmake ../../..
    
  2. Run make in build (<cmake_binary_dir>) directory:
    make
    
Note
 
Optionally you can strip symbols info from the created library via install/strip make target. This option produces smaller binary (~ twice smaller) but makes further debugging harder.

Enable hardware optimizations

Depending on target platform architecture different instruction sets can be used. By default compiler generates code for armv5l without VFPv3 and NEON extensions. Add -DENABLE_VFPV3=ON to cmake command line to enable code generation for VFPv3 and -DENABLE_NEON=ON for using NEON SIMD extensions.
TBB is supported on multi core ARM SoCs also. Add -DWITH_TBB=ON and -DBUILD_TBB=ON to enable it. Cmake scripts download TBB sources from official project site http://threadingbuildingblocks.org/ and build it.

How do I cross-compile the kernel on a Ubuntu host?


Preparation

First, we need to install the required prerequisites. I assume you have sudo access.
sudo apt-get install git ncurses-dev make gcc-arm-linux-gnueabi
  • git is the version control system used by the Linux kernel team.
  • ncurses is a library for build console menus. It is necessary for menuconfig.
  • make runs the compilation for us.
  • gcc-arm-linux-gnueabi is the cross-compiler.
Next, we need to retrieve the source, run:
git clone https://github.com/raspberrypi/linux raspberrypi-linux
cd raspberrypi-linux
This will clone the source code to a directory called raspberrypi-linux and change to it.

Compilation

We first need to move the config file by running
cp arch/arm/configs/bcmrpi_cutdown_defconfig .config
Then configure the kernel build
make ARCH=arm CROSS_COMPILE=/usr/bin/arm-linux-gnueabi- oldconfig
Optional: Customise the build using menuconfig
make ARCH=arm CROSS_COMPILE=/usr/bin/arm-linux-gnueabi- menuconfig
Then run the compilation
make ARCH=arm CROSS_COMPILE=/usr/bin/arm-linux-gnueabi-gcc -k

References


Raspberry Pi Wireless Hotspot:

What does it do?
This project configures your Raspberry Pi to connect to the Internet through ethernet, and share that connection over WiFi.
What do you need?
·        A Raspberry Pi, model B.
·        A boot SD card for the Raspberry Pi.
·        A USB WiFi device that supports "Access Point" mode.
·        An Ethernet cable to connect to the local network.
Please make sure you Wifi dongle supports Access Point or Master Mode
·        Edimax does NOT support Access Point (UPDATE 8/22/15: Edimax DOES support Access point. Updated project has rtl drivers in hostapd 2.4: Raspberry Hotspot with Edimax USB WiFi Adapter)
·        AirLink 101 / AWL5088 does NOT support Access Point
·        Panda Ultra, Mid-Range and 300Mbps Wireless N adapters support Access Point
·        Ralink RT5370 and RT5372 DO support Access Point
What skill level is required?
This project does not require any coding or compilation. Very basic Linux and networking knowledge would be useful, but not essential.
To edit a configuration file (for example /etc/udhcpd.conf) use the following command
sudo nano /etc/udhcpd.conf
You will find yourself in a simple editor. Move around using the arrow keys. To save the file press Ctrl-o. To exit press Ctrl-x.
How does it work?
The Raspberry Pi is configured as a WiFi Hotspot, just like you would see in an internet cafe. It allows you to connect to the internet over WiFi using the Raspberry Pi as the bridge to the internet. The basic steps are
·        Enable a WiFi Access Point and broadcast on the channel of your choice
·        Assign dynamic IP addresses to any device that connects to WiFi network
·        Join the WiFi and Ethernet networks together by using Network Address Translation
Instructions
The following steps were performed on Raspbian but should be much the same on any Debian-based distro.
1. Install the necessary software.
sudo apt-get install hostapd udhcpd
2. Configure DHCP. Edit the file /etc/udhcpd.conf and configure it like this:
start 192.168.42.2 # This is the range of IPs that the hostspot will give to client devices.
end 192.168.42.20
interface wlan0 # The device uDHCP listens on.
remaining yes
opt dns 8.8.8.8 4.2.2.2 # The DNS servers client devices will use.
opt subnet 255.255.255.0
opt router 192.168.42.1 # The Pi's IP address on wlan0 which we will set up shortly.
opt lease 864000 # 10 day DHCP lease time in seconds
Edit the file /etc/default/udhcpd and change the line:
DHCPD_ENABLED="no"
to
#DHCPD_ENABLED="no"
You will need to give the Pi a static IP address with the following command:
sudo ifconfig wlan0 192.168.42.1
To set this up automatically on boot, edit the file /etc/network/interfaces and replace the line "iface wlan0 inet dhcp" to:
iface wlan0 inet static
  address 192.168.42.1
  netmask 255.255.255.0
If the line "iface wlan0 inet dhcp" is not present, add the above lines to the bottom of the file.
Change the lines (they probably won't all be next to each other):
allow-hotplug wlan0
wpa-roam /etc/wpa_supplicant/wpa_supplicant.conf
iface default inet manual
to:
#allow-hotplug wlan0
#wpa-roam /etc/wpa_supplicant/wpa_supplicant.conf
#iface default inet dhcp
3. Configure HostAPD. You can create an open network, or a WPA-secured network. A secure network is recommended to prevent unauthorized use and tampering, but you can also create an open network. To create a WPA-secured network, edit the file /etc/hostapd/hostapd.conf (create it if it doesn't exist) and add the following lines:
interface=wlan0
driver=nl80211
ssid=My_AP
hw_mode=g
channel=6
macaddr_acl=0
auth_algs=1
ignore_broadcast_ssid=0
wpa=2
wpa_passphrase=My_Passphrase
wpa_key_mgmt=WPA-PSK
wpa_pairwise=TKIP
rsn_pairwise=CCMP
Change ssid=, channel=, and wpa_passphrase= to values of your choice. SSID is the hotspot's name which is broadcast to other devices, channel is what frequency the hotspot will run on, wpa_passphrase is the password for the wireless network. For many, many more options see the file /usr/share/doc/hostapd/examples/hostapd.conf.gz
If you would like to create an open network, put the following text into /etc/hostapd/hostapd.conf:
interface=wlan0
ssid=My_AP
hw_mode=g
channel=6
auth_algs=1
wmm_enabled=0
Change ssid= and channel= to values of your choice. Note that anyone will be able to connect to your network, which is generally not a good idea. Also, some regions will hold an access point's owner responsible for any traffic that passes though an open wireless network, regardless of who actually caused that traffic.
Edit the file /etc/default/hostapd and change the line:
#DAEMON_CONF=""
to:
DAEMON_CONF="/etc/hostapd/hostapd.conf"
4. Configure NAT (Network Address Translation). NAT is a technique that allows several devices to use a single connection to the internet. Linux supports NAT using Netfilter (also known as iptables) and is fairly easy to set up. First, enable IP forwarding in the kernel:
sudo sh -c "echo 1 > /proc/sys/net/ipv4/ip_forward"
To set this up automatically on boot, edit the file /etc/sysctl.conf and add the following line to the bottom of the file:
net.ipv4.ip_forward=1
Second, to enable NAT in the kernel, run the following commands:
sudo iptables -t nat -A POSTROUTING -o eth0 -j MASQUERADE
sudo iptables -A FORWARD -i eth0 -o wlan0 -m state --state RELATED,ESTABLISHED -j ACCEPT
sudo iptables -A FORWARD -i wlan0 -o eth0 -j ACCEPT
These instructions don't give a good solution for rerouting https and for URLs referring to a page inside a domain, like www.nu.nl/38274.htm. The user will see a 404 error. Your Pi is now NAT-ing. To make this permanent so you don't have to run the commands after each reboot, run the following command:
sudo sh -c "iptables-save > /etc/iptables.ipv4.nat"
Now edit the file /etc/network/interfaces and add the following line to the bottom of the file:
up iptables-restore < /etc/iptables.ipv4.nat
5. Fire it up! Run the following commands to start the access point:
sudo service hostapd start
sudo service udhcpd start
Your Pi should now be hosting a wireless hotspot. To get the hotspot to start on boot, run these additional commands:
sudo update-rc.d hostapd enable
sudo update-rc.d udhcpd enable
At the completion of these instructions, your Pi should be providing a wireless network and allowing other devices to connect to the Internet. From my experience, the Pi makes a decent access point, although with cheaper WiFi dongles range will be fairly limited. I haven't stress tested this setup, but it seems to work fairly well and is handy when a "real" access point isn't available. I wrote most of the instructions from memory, if you find any errors/typos I'll correct them.
This tutorial originally was a post on the Raspberry Pi forum here, you can reply to that topic if you have issues. Thanks go to all the people who tested my tutorial on the forum, and to poing who contributed the WPA HostAPD config.

Please make sure you Wifi dongle supports Access Point or Master Mode
·        Edimax doesn't support Access Point (UPDATE 8/22/15: Edimax DOES support Access point, hostapd 2.4 with rtl driver: Hostapd-rtl8188)
·        AirLink 101 / AWL5088 doesn't support Access Point
·        Panda Ultra, Mid-Range and 300Mbps Wireless N Adapters support Access Point

·        Ralink RT5370 supports Access Point